The purpose of this tutorial is to create sort of a 'minimum viable product' when it comes to modding -- a simple mod including all of the facets that normally come to mind when one thinks of a Starsector mod. By the end of this tutorial, you will have a mod with a custom ship, weapon, faction, star system, and associated other creations, as well as a passing familiarity with the concepts and processes involved in implementing these.
First, lets go over what we're gonna need:
- A free text editor. The Notepad program that comes with Windows is bad and you shouldn't use it.
- A spreadsheet editor for .csv files: If you have a license for Microsoft Excel you can use that (as long as your language is set to US English or else it saves wrong), otherwise I recommend downloading the free Ron's CSV Editor.
- An art program that supports transparency layers: Adobe Photoshop is industry standard, but expensive. Many people use Krita or GIMP (which are free) to good effect.
- The Starsector Ship and Weapon editor.
- Eventually, (you do NOT need to set up an IDE for making a basic ship or weapon!) an IDE for editing scripts and compiling a .jar file. There are several tutorials on the forums on how to set up your preferred IDE for Starsector modding:
Once we've got those together, we're ready to start working on our mod.
Mod Framework[]
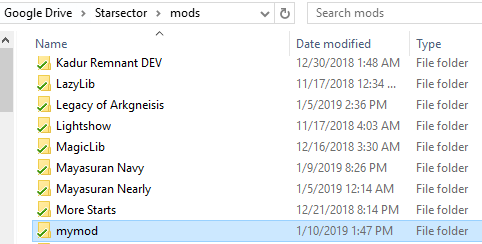
So, the first thing we need to do is literally create the mod. Navigate to your Starsector install directory, open the /mods/ subfolder, and create a new folder -- title it whatever you want the name of your mod to be. For this tutorial, we're going to call it 'My Mod'.
Once we've done that, we're going to need a mod_info.json file -- this is a JSON formatted text file that tells the game that the mod exists. The easiest way to get a working one is to copy it from another mod so let's go ahead and do that -- mod_info JSONs aren't the sort of thing where you have to worry about intellectual property. Opening up a mod_info.json from an existing mod, it should look something like this:
{
	"id":"vayrasector",
	"name":"Vayra's Sector",
	"author":"Vayra",
	"version":"3.0.1", # GO UPDATE YOUR VERSION FILE (as the last thing you do before uploadin cuz otherwise... heh)
	"description":"Remember to edit VAYRA_SETTINGS.ini in the mod directory to enable/disable features. Requires LazyLib.",
    "gameVersion": "0.96a-RC10",
    "dependencies": [
        {
            "id": "lw_lazylib",
            "name": "LazyLib"
        },
    ],
	"jars":["jars/VayraSector.jar"],
	"modPlugin":"vayra.example.MyModPlugin",
}
We're going to throw out some of that stuff, and change the rest. Most of these fields are fairly self-explanatory, but here are some that require special attention:
- 'id' - This is the ID for your mod. It should be all lowercase and easy to remember, but long enough to be definitely unique. Since we're making a mod called 'My Mod', we're going to make our ID 'mymod'.
- 'jars' - This will be a reference to your actual compiled code file, once you have one. Since we don't have one yet, we're going to delete the whole line.
- 'modPlugin' - This will be a reference to your ModPlugin Java class, once you have one. Since we don't have one yet, we're going to delete the whole line.
Once you're finished, the file should look something like this:
{
    "id": "mymod",
    "name": "My Mod",
    "author": "Some Loser",
    "version": "0.1 prerelease",
    "description": "My Super Cool Mod (original work DO NOT STEAL)",
    "gameVersion": "0.95a-RC15",
}
Save that file in Starsector/mods/mymod (or whatever you named your mod folder)... And that's it! Congratulations, you're done! You've made a mod!
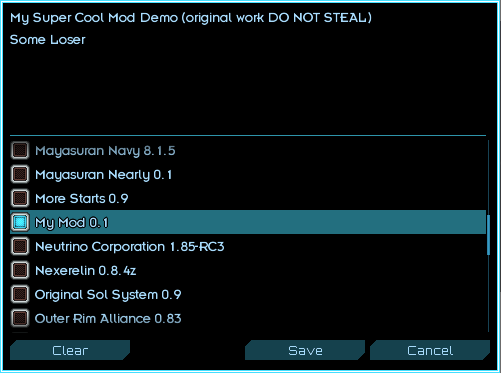
It appears in the mod list and you can select it and run Starsector with it enabled! It won't do anything yet, of course, but we've taken the first step. Give yourself a pat on the back.
Custom Ship[]
Now that we've created a mod, let's make that mod actually do something! Specifically, let's make it add a custom ship to the game. That's probably what you wanted to learn how to mod to do anyway, right? I bet it was.
For the purposes of this tutorial, we're going to be creating a little shuttle called the Bastard, with a small missile hardpoint and a universal turret. Later, we'll make a custom ship system, hullmod, and weapons for it, but for now it'll just be a ship.
Spriting[]
The first thing you're going to need is a ship sprite. This should be a .PNG file with a transparent background, saved at 72 pixels/inch (not necessary, but helpful) and in 8 bits per channel color (absolutely necessary), with as little extra 'blank space' around the ship as possible. I'm not going to give a whole treatise on the artistry of making ship sprites (at least partially because I'm not great at it myself) but some important points to remember and useful resources are:
- Generally speaking, the process most people recommend for creating a ship sprite is:
- Sketch a silhouette/outline and maybe some blocks of color. Roughly place weapon mounts, engines etc and think about how these will affect gameplay. Don't worry about size too much right now.
- Bring the sketch into your painting program (if you drew it on paper or whatever and it's not already there), and shrink it down to the correct size, comparing it to ships you want it to be roughly equivalent to. Place actual weapon mounts now, and make sure everything has enough room.
- Copy or 'kitbash' bits of existing sprites over your outline to get a rough idea of details and shading -- this part is optional, especially if you're a good artist, but usually a good idea.
- Paint over the kitbashed parts to mesh everything together and make it your own.
- Starsector sprites are tiny paintings, not pixel art. Well okay, they're kind of pixel art -- really a combination of the two. But generally speaking, you want to be using primarily painting techniques and only doing pixel art to bring out fine details, et cetera, on the finished sprite. You can do darker shading on the edges, but NO BLACK OUTLINES.
- Here is a very good painting tutorial that gets linked to often. Of special note is the section on lighting, but the whole thing is good.
- It's important that ships match the general size and particularly pixel mass of existing sprites in their ship size class. Pixel mass is the total count of nontransparent pixels in the sprite -- you can find this using your painting program's histogram function, and compare it to this list of Starsector sprite pixel masses.
- Reading this piece on fictional spaceship design is probably a good idea.
- David Baumgart, the artist behind the existing Starsector ship sprites, has made quite a few posts regarding his process: YouTube Video Blog Post One Blog Post Two Blog Post Three Blog 'Art' Tag
- A few other talented modders have also made YouTube videos, in particular I recommend watching MShadowy sketching and all of Tartiflette's videos.
- Some further links: Psiyon does "Hardcore Kitbashing", Mendonca paints a ship over two parts.
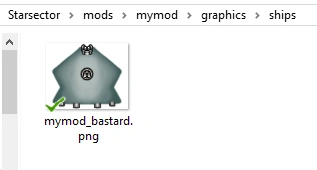
I've gone ahead and made this beautiful sprite, which should have size and pixel mass appropriate for a small frigate-class vessel, about the same size as a Kite:

Having done that, let's create a 'graphics/ships' folder and save the sprite there, with an all-lowercase filename starting with your mod prefix (which should be your mod ID if it's short enough, or the first significant word in your mod's name, or something of the like -- ideally more than 4 or 5 characters long) and an underscore. In the end, it should look like this:
Ship Data files[]
Now that we've created the sprite, we're going to need some data files to tell the game that it's a ship and what stats to give it. First, we're going to create some more folders:
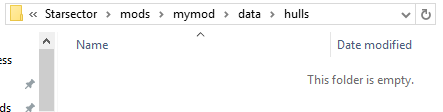
And then we're going to need a line entry in our ship_data.csv for the ship we're making, and a .ship file. Since we don't even have a ship_data.csv file yet, let's copy vanilla's from 'Starsector/starsector-core/data/hulls/', and delete all the lines, just so we have all the columns right. Now, let's go back to vanilla's ship_data.csv and copy a line of stats over from a ship that's fairly close to what we want ours to be. In this case, I'm picking the Kite.
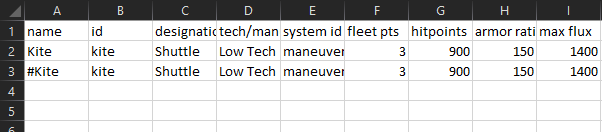
As you can see, I've actually pasted it in twice and prepended a '#' to the second one's name -- I'm going to leave that one there as I edit the top one, so I can compare my stats to the original without opening vanilla's ship_data file again. I'm not going to tell you how to set up your stats, so use the vanilla file and the Ship Data CSV wiki page as references and get to editing. Just make sure you at least change the name and hull id (which should be prefixed with your mod prefix, and all lowercase). In the end, you should end up with something like this:

I've set up the Bastard as a little, speedy, tough-to-kill light crew and cargo hauler -- nothing approaching the efficiency of the Mudskipper or the speed and armament of the Hound, but much more survivable. Now that we've done that, it's time to fire up the Ship and Weapon Editor and make our ship file!
Ship Editor[]
(Just as a reminder, these instructions are for the Starsector Ship and Weapon Editor from the Starsector forums)
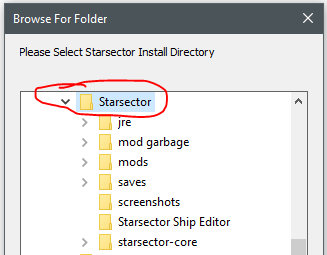
On running the ship editor for the first time, you're going to see a little pop-up telling you to select the Starsector install directory. It's important that you select the root folder here, not 'starsector-core' or anything else.
The first thing you're going to notice once you get into the editor is the whole pile of menu items. Don't panic, we're going to go through them one by one. It's important to do this, by the way -- it's very easy to miss a step here, and could cause some difficult-to-troubleshoot problems down the road.
First, we have to load our mod folder: Press 'm', then navigate to `Starsector/mods/` and select your mod folder - in this case 'Starsector/mods/mymod/'.
Next we're going to do is press 'i' and load in our nice new ship sprite, then press 't' to edit the details. If something goes wrong and your ship editor won't load any ships or weapons, simply delete the .json file in the ship editor directory -- this will reset the settings -- and run the program again, making sure to load the starsector folder and then mod folder separately and correctly.
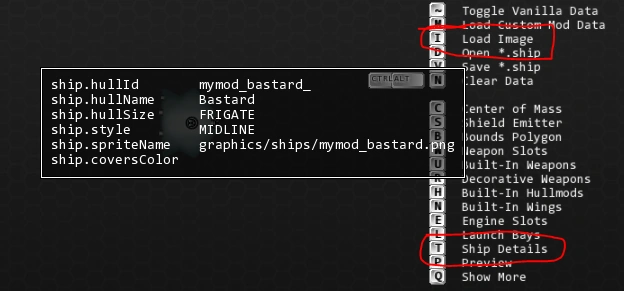
Then we're going to press 'esc' to close out of the ship details screen, and 'v' to save it. Make sure you're saving it in the 'mymod/data/hulls' directory -- the editor might default somewhere weird.
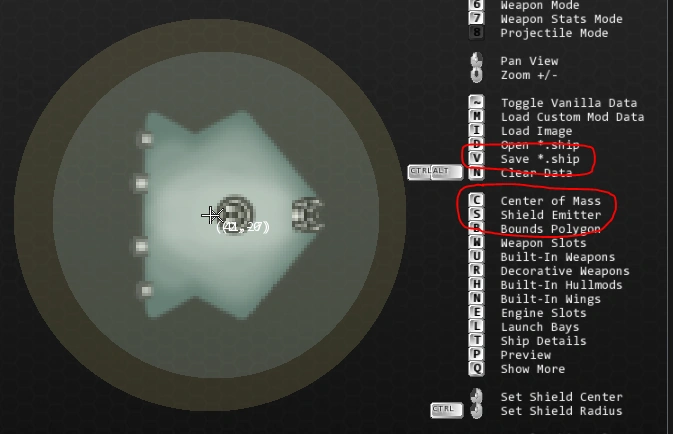
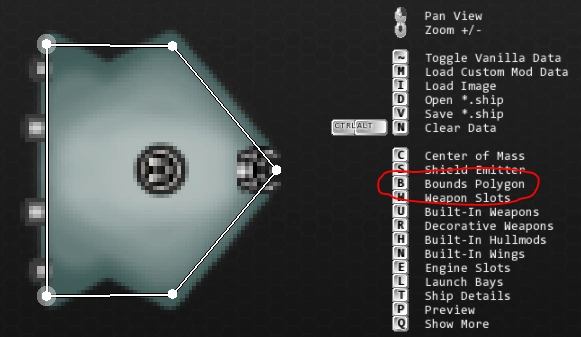
Once we've saved it, let's continue: Press 'c' and set the center of mass (the point the ship turns around) then 'ctrl' and drag out the collision circle -- this needs to fully encompass the ship and it's shields, so don't be afraid to set it a little big. After that, press 's' (and then 'ctrl') to do the same thing with the shield center (and the shield circle). Do that even if the ship you're making doesn't have shields -- some other effects may use it. The shield circle should completely encompass the ship sprite (and ideally some room behind it, for engine flares) and fall entirely within the collision circle.
Once you're done that, it's time to move on the the bounds polygon. Press 'b' to open that menu, then place points with 'shift+leftclick'. You can turn 'mirroring' on and off with the spacebar. Note that the bounds polygon shouldn't be too detailed -- even though my Bastard-class has little hip dips, we can bound it with only five vertices, like so:
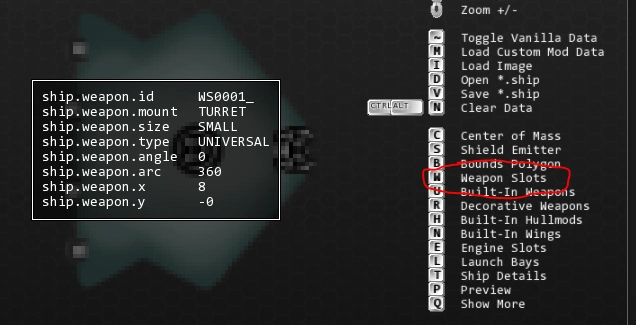
Once you're done that, save it again and it's time to do weapon slots. I'm going to trust you to read the hotkeys for that on your own. Important note: Whenever placing a weapon slot it will default to the same size and type as the nearest existing weapon slot, or a Medium Energy Turret if there are no others. For this reason it is extremely important to go over all of your weapon slots after placing them and press 't' while mousing over each one to check (and set, if necessary) the size, type, and turret/hardpoint settings:
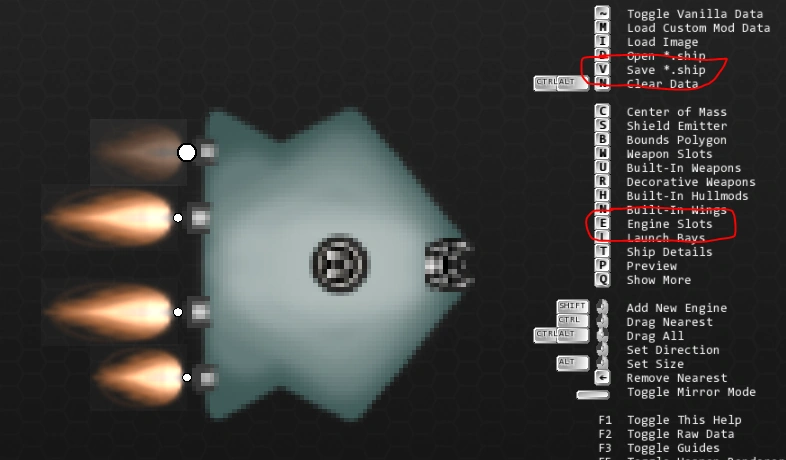
Since we don't have any hullmods or special weapons done yet, we're going to skip over those options and move right on to engines. Engines are also fairly straightforward, but some things you'll want to remember are:
- Just like weapon slots, engine slots default to the same settings as the nearest existing engine or LOW_TECH if there aren't any -- even if you already set the whole ship's tech level to something else. So just like weapon slots, make sure you mouse over them all and press 't' over each one to double-check their settings.
- 128 is a magic number: Setting 'contrailSize' to 128 in the engine settings will make that engine flare disappear, and only show up when the ship is using its shipsystem. This is useful for things like maneuvering jets -- Open up the vanilla Eagle .ship file in the ship editor and take a look at it for an example.
After creating engines, make sure to save by pressing 'v' before continuing:
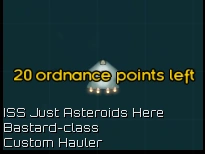
And hey! We've got a complete ship! It doesn't have a description or any variants and it won't spawn anywhere, but it does technically exist -- at this point you could theoretically spawn it into the campaign using a console command. In fact, let's test that before we do anything else -- just to make sure we haven't mucked anything up. Load up the game (make sure to check off your mod in the mod list!), start a new campaign, open the console by pressing 'ctrl+backspace' (unless you've changed the keybinding), and type in 'addship' followed by your hull ID:
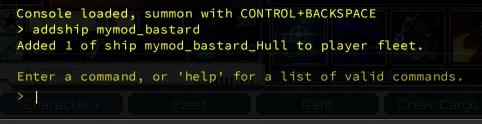
If you did everything correctly so far, it should print the above message and the ship will be added to your fleet. Go ahead and exit out of the console, press 'r' to open the refit screen, and take a moment to appreciate the beauty of your creation:
This also might be a good opportunity to activate devmode (type 'devmode' into the console and hit enter) and play around with it in the simulator, just to make sure it's all copacetic in the combat engine as well and adjust any stats you might need to -- devmode lets you reload data files such as ship stats from within the simulator by pressing F8, allowing you to test changes without having to exit and relaunch Starsector.
Once you've done that, we'll move on to the final steps: descriptions, variants, and campaign spawning implementation.
Descriptions[]
You may have noticed when testing that your ship has the standard 'No description yet...' text string when you mouse over it. That's okay, we'll take care of that right now. First, create another folder:
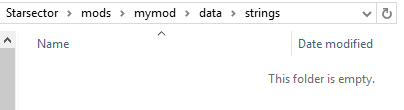
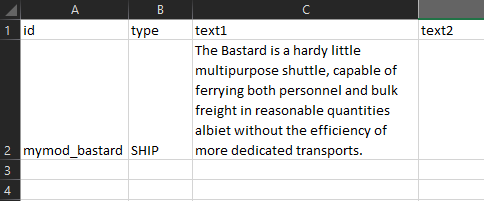
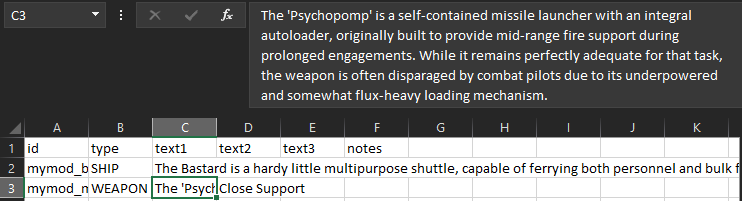
Then, we're going to open the 'starsector-core/data/strings' folder, copy 'descriptions.csv', and paste it into ours. Open that file up and delete all the lines below the headers, just like you did with ship_data.csv. Next, we're going to add a line with the following information: 'id' needs to match the id of our ship in the .ship file and ship_data.csv, 'type' should (in this instance) be 'SHIP', and 'text1' will contain the actual description of our ship.
Note that while you can add new lines within the 'text1' cell using 'alt+enter', only the first line will be displayed in-game outside of the codex, so try to keep most of the immediately useful information there. The rest of the fields can remain empty for ships (though they are used for weapons and some other things).
Once you've done that, save the file, then open Starsector and look up your ship in the codex (or spawn it into the campaign again) to test and make sure it's reading correctly.
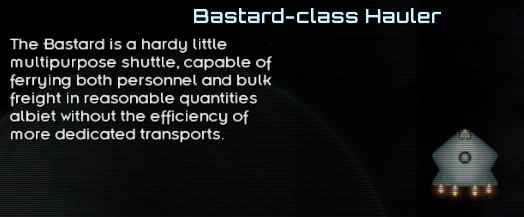
Looks like it is, so we're good to go! Time to move on to making a variant, and then making it spawn.
Loadout Variants[]
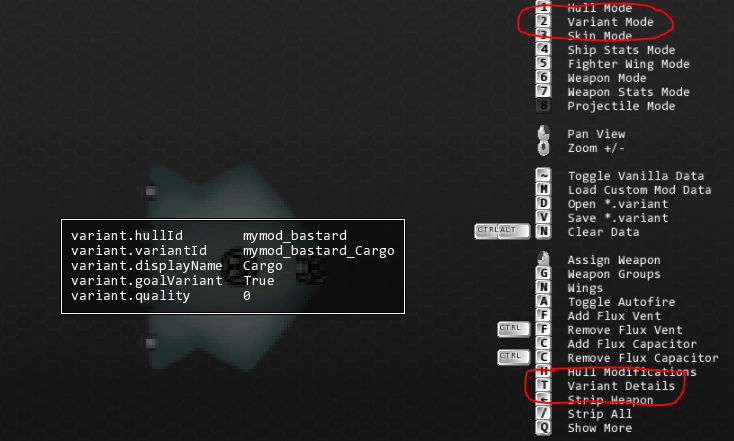
First things first: Reopen the ship editor, press 'd' to load your ship, and then press '2' to go to variant mode. Press 't' to open the details pane, give your variant a descriptive name (the hull id should already be set, assuming you loaded your ship first), then press 'esc' to close the details pane and 'v' to save the variant. Make sure you're saving it in the 'mymod/data/variants' directory, which you'll have to create if it doesn't exist yet.
Note: If your ship won't load, press 'm' to load custom mod data and select your 'mymod' folder in the 'Starsector/mods/' directory, then press 'OK'.
Note: the standard convention for variant ids is 'modprefix_hullid_Variantname' -- you don't have to use this, but it will certainly make things more consistent. Note the capital letter at the start of the variant name in the id.
Once you've saved your variant, build it out with weapons and flux vents/capacitors using the hotkeys. You can also add hullmods here, or fighter wings if your ship is a carrier. Your ships current flux infrastructure and OP are displayed in the top left corner.
- If it doesn't seem to be picking up the maximum OP correctly in the top left corner, exit the ship editor, check to make sure the id is set correctly in your ship_data.csv and that the file is saved in the right location, then re-open the ship editor and re-load your ship.
- The 'Wings' setup (hotkey 'n') is currently busted, and won't let you exit the menu but will still let you save the variant from within it -- so do fighter wing setup last, if your ship is a carrier.
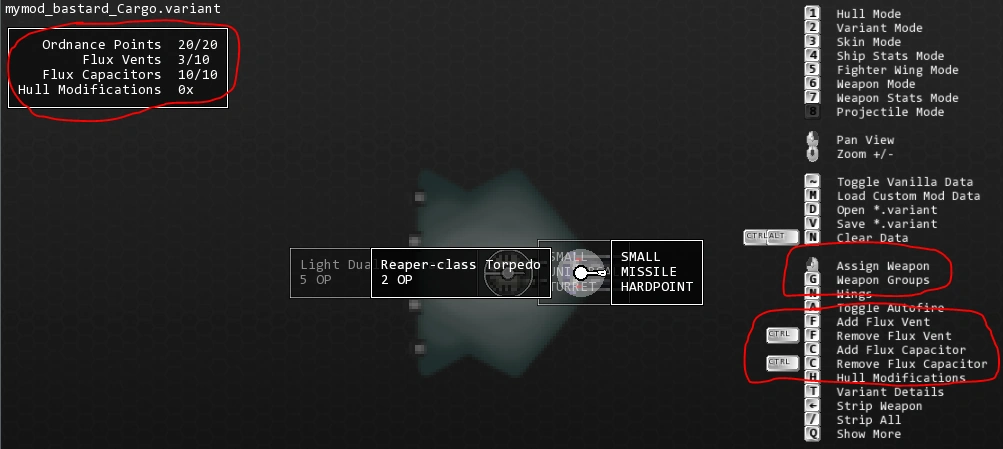
Now that looks like a fun and verisimilitudinous freight shuttle loadout! Press 'g' to setup your weapon groups before saving, then 'v' to save the variant, close the ship editor, and we're done!
Campaign Spawning (also required for Custom Production from Colonies)[]
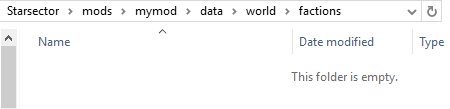
Making our little Bastard spawn in the campaign is going to be fairly straightforward, but we will need a few more folders in our mod structure. Note that this is two new folders, a 'world' folder inside 'data', and then a 'factions' folder inside 'world'.
Go to the same folder path in 'starsector-core' (so, 'starsector-core/data/world/factions'), copy the 'default_ship_roles.json' file, and paste it into your folder. Open that up, and woah, that's a lot of text! Go ahead and delete everything but the categories you're actually using (you can copy in more categories from vanilla's default_ship_roles.json later, when you add more ships to your mod), then delete everything inside those categories -- what the categories do should be fairly self-explanatory. Some helpful tips though:
- The number after the variant id in each list is the spawn weighting, i.e. how likely that variant is to spawn when the spawning faction 'knows' it and a ship of that category is needed. The default for vanilla Starsector is that each hull gets a total spawn weight of 10, divided equally between all of its variants, but you might want to give your hull a total spawn weight slightly below that if it's meant to be more rare, or adjust your spawn weight differently between variants if one is 'elite' or the like.
- For testing purposes, you might want to set the spawn weight to something much higher, like 9999 -- just to make sure you don't have to fly around in-game forever before seeing one. Remember to set it back before releasing your mod, of course!
Once we're done, the file should look something like this:
{
    "combatFreighterSmall": {
        "mymod_bastard_Cargo": 10,
    },
    "civilianRandom": {
        "mymod_bastard_Cargo": 10,
    },
}
Now we've got spawn weights set up, but the Bastard isn't quite fully implemented yet -- no faction knows how to build it, after all. In order to get that working, we're going to have to reopen our ship_data.csv file. Scroll over to the right to find the 'tags' column, and input some tags -- these determine who will 'know' the ship blueprint. Notes:
- most tags ending in '_bp' are blueprint package tags -- adding a ship to these will make it 'known' by anyone who 'knows' that tag, and will add it to the blueprint package matching that tag, allowing the player to learn it by finding the matching package blueprint -- i.e 'lowtech_bp' can be used to add a ship to the Low Tech Blueprint Package.
- the 'base_bp' tag is a special blueprint package tag -- adding a ship to this will make it known by all factions that know the 'base_bp' tag (that's all vanilla factions, and many mod factions too) as well as the player, from the very start of the game.
- the 'rare_bp' tag works slightly differently -- adding a ship to this will allow the player to learn it by finding a blueprint for that specific ship and that ship alone. Using this tag, blueprints are generated automatically by the game. Generally speaking a ship should only be part of one blueprint tag -- either 'rare_bp' or a package blueprint.
- tags corresponding to factions are faction tags -- adding a ship to these will make it 'known' by that faction specifically, without adding it to a package blueprint. Note that some factions have both a faction and a blueprint package tag -- i.e. 'pirate_bp' is a blueprint package tag, and 'pirates' is the faction tag for the pirate faction.
In this case, I want the Bastard to be fairly common among midline-capable factions so I'm adding it to the midline blueprint package tag, and besides that it seems like something that the Luddic Church would have access to despite not knowing the midline blueprint, so let's add it to their faction tag as well. Here's what this looks like all set up:

Save that file, and let's go test! Load up Starsector and start a new campaign, then open the console with 'ctrl+backspace' (again, unless you've changed the keybinding) and type 'findship' followed by your ship's hull id. Assuming you set the spawn weights and tags correctly, it should show up in a faction market or two -- but if it's not, try setting the spawn weights much higher (say, to 9999), starting a new campaign, and entering the console command again before you start troubleshooting.
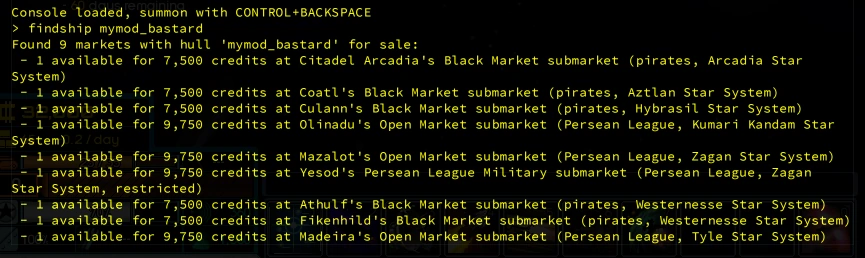
If you see something like the above, then you're good to go! Congratulations -- you've made and implemented a new ship! We're all done!
Custom Weapon[]
Now, we've made a ship, but we don't have any guns. We could slap regular guns on it, but that's boring and for losers and I bet you have a really cool idea for a missile with infinite ammo that costs 0 OP anyway, don't you?
Let's make that dumbass missile. Since it has infinite ammo, we'll make it a missile gun, with a recoiling barrel like most ballistic weapons, and a glow, so you learn how to do all those things too.
Projectile Sprite[]
First, we have to paint it: (read: open two vanilla missile sprites and bash them together)
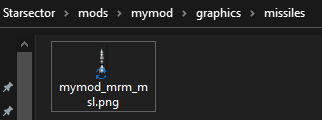
Note the filepath - the '/graphics/missiles/' directory is where we'll save all projectile graphics, including projectiles for nonmissile weapons. Create these folders now and save the missile sprite there if you haven't already.
Weapon Sprites[]
Now comes the slightly harder part, the weapon sprite itself. Most of the same basic info as ship spriting applies here just on a much smaller scale, so refer back to that section if you need a primer. The important changes from a ship sprite are as follows:
- Recoiling barrels have to be a separate sprite, so it's best to do them as a separate layer in your painting program (helps with lining them up, too, as getting them properly aligned if you did them in different files would be a pain). If your weapon won't have an animated barrel, you can do the barrel as part of the base sprite
- If you're planning on adding a glow effect like most energy weapons and electromagnetically powered ballistics such as railguns, etc receive, make sure to leave a couple pixels of empty space around each edge so you can do that later
- The sprite should have even height and width in pixels, i.e. be 34 pixels wide instead of 33, etc, or it'll end up blurry in-game when mounted on a properly centered weapon mount (which most are)
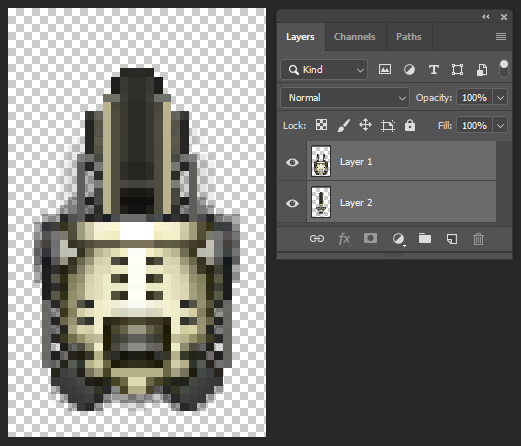
If you've been following correctly, you should wind up with something like the above!
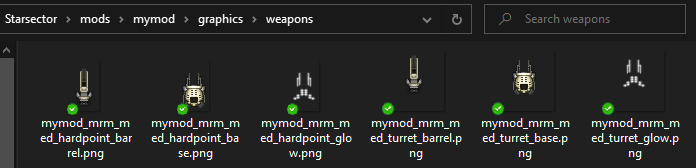
Once you have the base and barrel sprite done, save each layer individually (turn one off, save the file, turn that one on and the other one off, save the file again with a different name...) in '/graphics/weapons/', which you should create now if you haven't already, then resize the canvas to a square, center the sprite so that the exact center of the canvas is under the point you want the weapon to rotate around, and repeat the saving process. If you wanted to, you could also paint slightly different versions for the hardpoint vs. the turret (vanilla weapons often have slightly longer and square-er sprites for the hardpoint and slightly shorter and rounder sprites for the turret), but for the purpose of this guide we aren't going to bother.
For reference, the typical naming schema for weapon sprite files is something like 'prefix_weaponname_mounttype_spritetype'. For our mod with the 'mymod_' prefix and this weapon which is going to be a Medium-mount sized Medium Range Missile with the 'mrm_med' id, you should have file names something like:
- mymod_mrm_med_turret_base for the base turret sprite
- mymod_mrm_med_turret_barrel or _recoil for the turret barrel
- as above but with hardpoint instead of turret for the hardpoint sprites
- and as above but with glow instead of base or barrel (or recoil) for the glow sprites

You'll notice we don't have glow sprites yet. That's okay, we'll do those next. Open your weapon sprite document back up (the base, not the barrel) and add a black layer behind it and an empty layer on top - you'll probably want to be doing this on the hardpoint sprite, to make sure you're not painting over the edges of the canvas. Set your brush hardness to 0% or another low value, opacity to something under 30%, color to white, and paint over the weapon in places you want it to glow - turning the weapon layer on and off as you go to help you see what you're doing better.
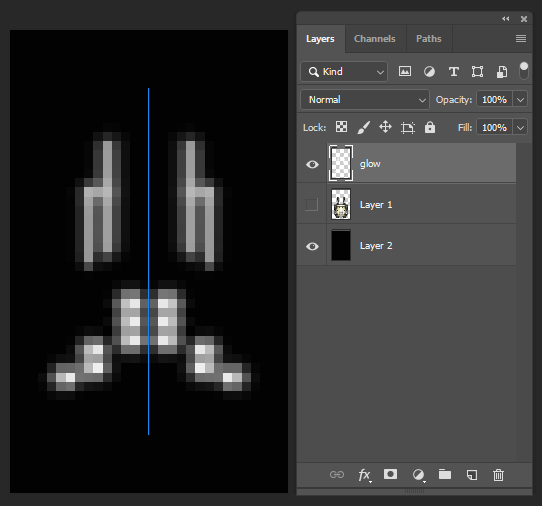
You should end up with something like this. Go ahead and save that as the glow sprite (remember to turn off the base and black layers), then open the turret base sprite, copy in the glow layer, align it, and repeat.
Congratulations, you're all done spriting the weapon! Now it's time to make some stats for it, then we'll line it all up and fire it off in-game.
Weapon Data files[]
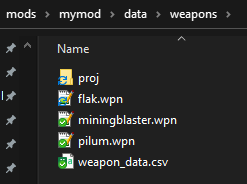
First things first, we're going to create the folder structure and copy in the vanilla 'weapon_data.csv' as well as some weapons I intend to steal lines of JSON from - let's take the Flak Cannon for its recoiling barrel and Mining Blaster for the glow effect. I'm also creating a '/weapons/proj/' folder and copying the vanilla Pilum into it to turn into our projectile.
Next, open up weapon_data.csv in your spreadsheet editor. We're going to follow the same process as we did with the ship_data.csv, deleting all the lines but the ones closest to what we want and then modifying one and deleting the others.
Since this is going to be a sustained-fire weapon and DPS is important, we'll probably want a way to calculate DPS without opening the game every time. For that, you can use this spreadsheet (make a copy)
Another important thing to note is that, just like ship_data.csv, you'll need to add blueprint or faction tags in the 'tags' column if you want anyone to 'know' the blueprint for the weapon - i.e. for it to show up at all. I've gone ahead and tagged this one with 'midline_bp'.

Once that's all set up, it's time to start messing with the .wpn and .proj files.
Just like with the sprites, we'll do the projectile first. Rename the one you copied to whatever your missile ID is going to be (for this tutorial we're using 'mymod_mrm_msl') and open it up in Notepad++.
NOTE: If you're making a beam you can skip this step as beams, for reasons that should be obvious, don't need .proj files.
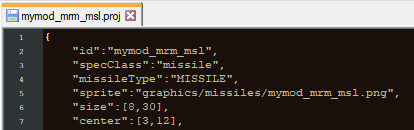
Most of the file you can change or not change as you like, but these pictured lines are very important, as is the filename. The 'id' must match the filename exactly, and should be prefixed with your mod prefix. The 'sprite' needs to point to the projectile sprite in /graphics/missiles/, and the 'size' and 'center' should match up with the dimensions and center of the missile sprite. Beyond that, change whatever you like about the visual properties, turn rate stats, etc of the missile.
NOTE: There are some special cases that make actual Missiles different from projectiles like cannon rounds, plasma blasts, etc. such as missileType and a few other fields - more details can be found on the .proj File Overview page.
Once you've done that, do more or less the same to the .wpn file - rename it to your weapon id (the one you put in the id column of weapon_data.csv) and open it up in Notepad++, along with the other .wpn files you're going to copy stuff out of.
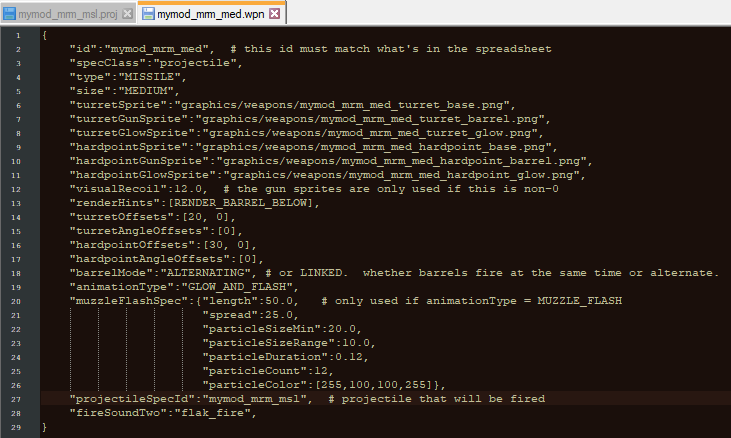
This one has a few more important lines - the 'id' and sprite paths have to match of course, but notably you also have to make sure you've changed the 'projectileSpecId' to point to the id of the .proj of your projectile. Besides that, I've changed the weapon type to 'MISSILE' like the Pilum, copied in the Mining Blaster's glow and muzzle flash settings, and changed the recoil to 12 pixels.
NOTE: As with the .proj file, there are some differences between .wpn files for projectile weapons (including missiles) and .wpn files for beams - more details can be found on the .wpn File Overview page.
Save the file, double-check your filenames are correct, and delete the vanilla copies since you don't need them anymore. It's time to put the finishing touches on our .wpn file - setting the muzzle offests using the Ship and Weapon Editor.
Weapon Editor[]
Open up the Ship and Weapon Editor, hit '6' to bring up Weapon mode, 'D' to open a weapon, navigate to your '/data/weapons/' directory, and open your '.wpn' file.
NOTE: I always do this last and it's the only part I do with the editor because the current version of the editor as of 2019-08-13 is buggy and not fun to do .wpn files with, and it mangles the formatting making the rest of it much harder to do afterwards. If it seems to have horribly fucked up your glow sprite, don't worry about it - it's just cosmetic and won't save to the actual file.
Once you have your weapon open in the editor, simply click to place the offset. If you're making a multibarrel weapon or want to set preset spread patterns with angle offsets (as in the Annihilator Rocket Launcher or Hammer Barrage, for example) there are options for that too, but we won't bother with them in this tutorial.
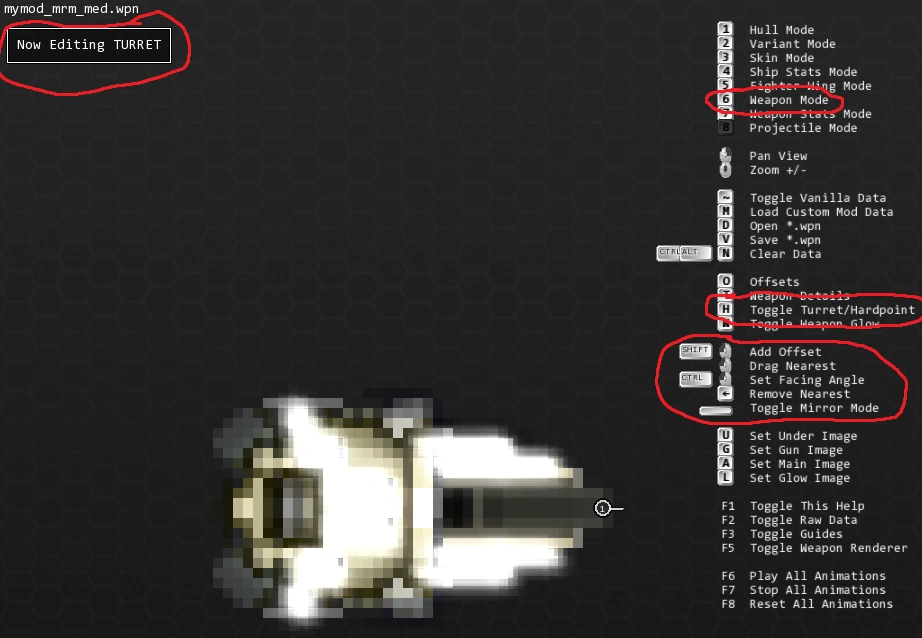
NOTE: Make sure you hit 'H' to swap to the other (Hardpoint vs. Turret) version of the weapon and set offsets there too. Once you're done, hit 'V' to save, and we're all set! Close out the weapon editor.
Let's slap a description on this bad boy, using the same process we did for the ship.
Once you've done that, it's time to test. Load up the game with our mod enabled - since it's a weapon and all weapons are available in mission refits, we don't even need to bother with starting a campaign or using console commands. Just select a mission that has a ship with the correct mount type, hit 'Refit', and there we go:
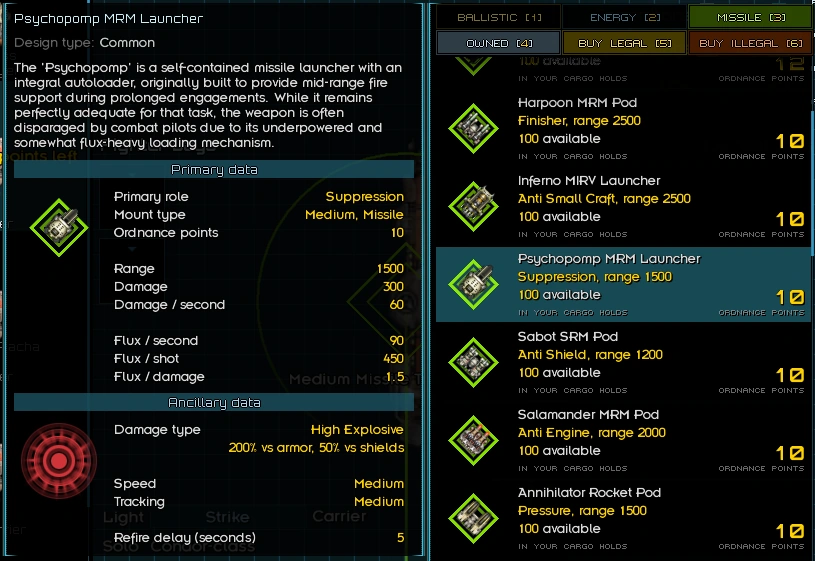
It's done! It's in! It should even show up in vanilla markets for factions that know the 'midline_bp' blueprint, since that's what I tagged it with. Congratulations! You've made a custom weapon!
...
Now balance the fuck out of it.
Custom Blueprint and Manufacturer/Tech Type[]
Alright! Now that we have a ship and a weapon, let's put them together into a custom blueprint package. If you tagged them with `rare_bp` or any other `_bp` tag, or if you only want them to be obtainable by raiding the factions that know them due to faction tags, you don't need to do this part - but if you haven't put them in another package that isn't `rare_bp` and you want them to be obtainable, together, from exploration content, then you'll need to.
Sprite[]
First of all, we'll need an image to use for our blueprint package - well, we don't need one, but if you don't set one up it'll be blank and ugly and people will keep reporting it as a bug. Forums user Harmful Mechanic has helpfully provided some templates in this forum thread, so we'll use one of those.
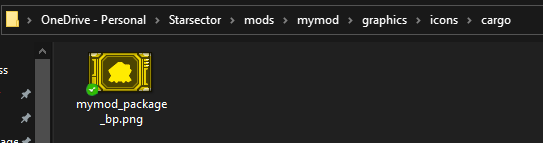
This file is a 64x40 PNG, and I just put the Bastard's silhouette over one of the templates with a color overlay. Note the filepath - create these folders.
Implementation[]
Once you've done that, we'll go on to create a `settings.json` file in the `/data/config/` directory (or better, copy one from an existing mod and edit it) so the game knows where to look for our fancy new blueprint graphic.
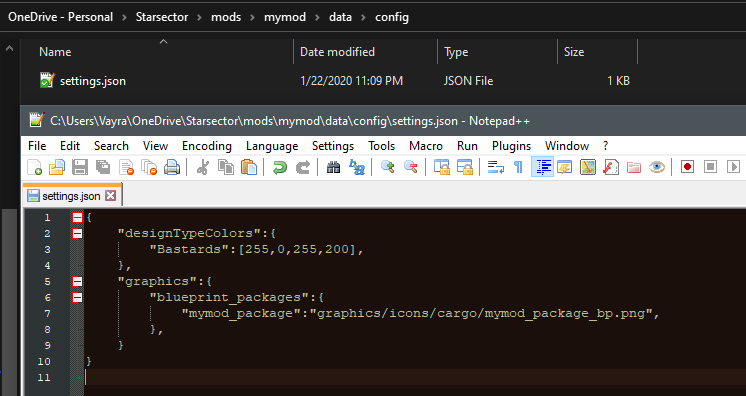
Note the filepath and the formatting - don't forget any `{}` or `,` or you'll regret it. I also took the opportunity to set up a "manufacturer/tech" type here. Now that that's done, we'll go apply it to our ship and weapon.

(Note: some columns are hidden so you can see both edited columns)

Note that besides adding our new package blueprint tag, I've removed `midline_bp` from the tags of both; and to compensate, I've added a whole bunch of faction tags to the Bastard so that most factions will still "know" it.
Once we've done that, it's time to create (or again, better, copy) another file - `data/campaign/special_items.csv`
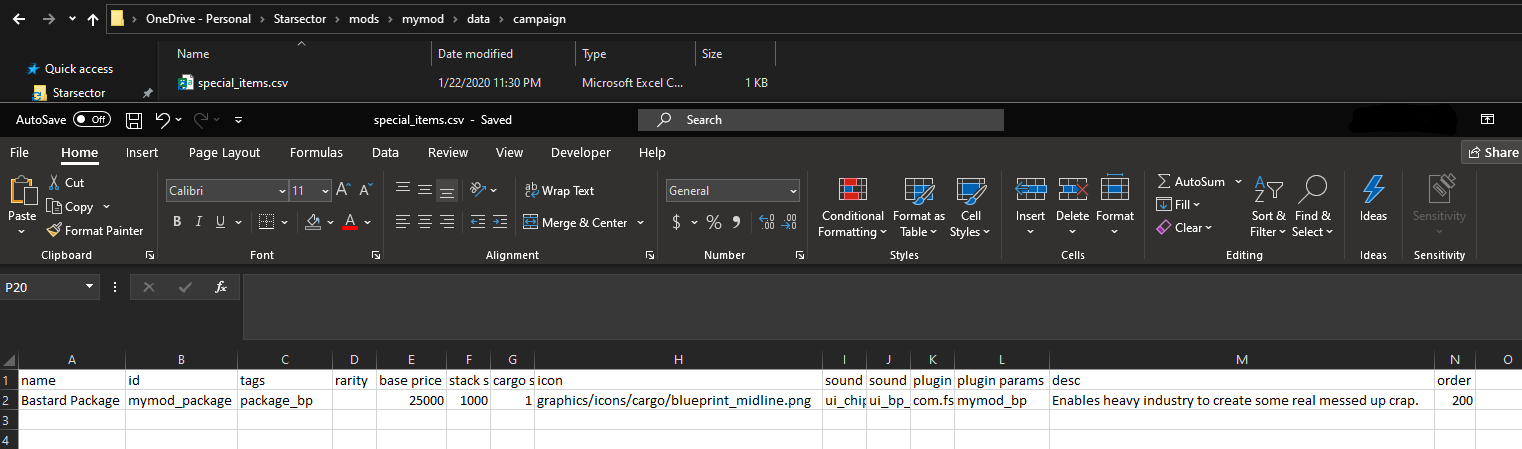
Note the filepath, and make sure to fill out all the fields. The `icon` field here can point to one of the vanilla blueprint "holder" sprites in `starsector-core`'s `/graphics/icons/cargo/`, or a custom one in the same folder in your mod directory. The `id` field must match the id you set in `settings.json` for your blueprint graphic, and the `plugin params` field must match the actual blueprint tag in your `ship_data.csv` and/or `weapon_data.csv`.
Once that's set up, it's time to start up the game and test.
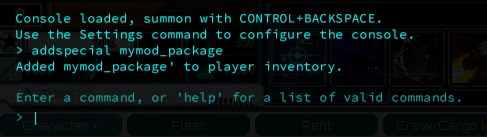
Open the console and type `addspecial <your blueprint package id>` - note this has to be the package id, not the blueprint tag.
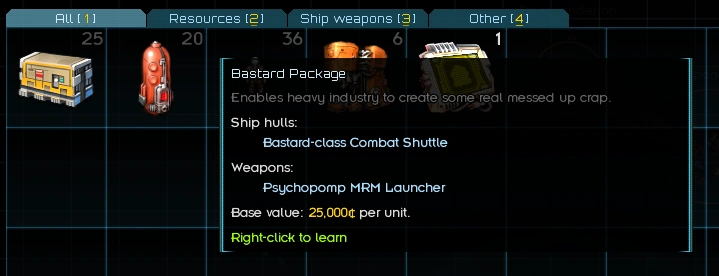
If everything went as planned, you'll have the blueprint in your inventory! Now might be a good time to learn it, cheat yourself a colony with Heavy Industry, and make sure that it spawns in fleets and everything as intended - but we'll end the tutorial here.
Custom Ship System[]
Custom Hull Mod[]
Custom Fighter Wing[]
TL;DR
You need (in rough order of creation):
- Sprite
- .ship file
- Entry in ship_data.csv
- Entry in descriptions.csv
- One variant file
- Entry in wing_data.csv
Sprites[]
(Note: Before reading you should read the guide on ship making first since they are very similiar)
The first thing you're going to need is a fighter sprite. This should be a .PNG file with a transparent background, saved at 72 pixels/inch (not necessary, but helpful) and in 8 bits per channel color (absolutely necessary), with as little extra 'blank space' around the ship as possible. (One pixel in each direction should be ideal)
- Generally speaking, the process I would recommend for creating a fighter sprite is:
- Sketch a silhouette/outline and maybe some blocks of color. Roughly place weapon mounts, engines etc and think about how these will affect gameplay. Don't worry about size too much right now.
- Bring the sketch into your painting program (if you drew it on paper or whatever and it's not already there), and shrink it down to the correct size, comparing it to fighters you want it to be roughly equivalent to. Place weapon mounts, and make sure everything has enough room.
- Kitbash parts of existing sprites over your outline to get a rough idea of details and shading -- this part is optional, especially if you're a good artist, but usually a good idea.
- Paint over the kitbashed parts to mesh everything together and make it your own.
- Fighter sprites are closer to pixel art than tiny paintings (in my opinion). Well okay, they're kind of like paintings -- really a combination of the two. But generally speaking, you want to be using primarily painting techniques and only doing pixel art to bring out fine details, et cetera, on the finished sprite. You can do darker shading on the edges, but NO BLACK OUTLINES.
- It's important that ships match the general size and particularly pixel mass of existing sprites in their ship size class. Pixel mass is the total count of nontransparent pixels in the sprite -- you can find this using your painting program's histogram function, and compare it to this list of Starsector sprite pixel masses.
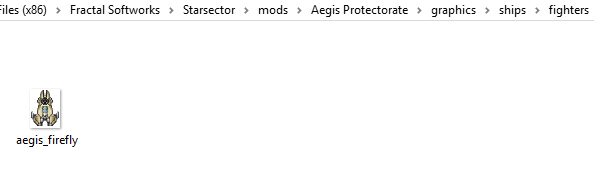
I've gone ahead and made this sprite for a upcoming mod of mine, which should have size and pixel mass around the same as a Thunder
![]()
Having done that, create a "fighters" folder in your graphics/ships & save it in there with a name like mymod_fighter. You could also just keep it in ships but I would highly recommend organizing.
After your done it should look something like this:
Fighter data files[]
Now that we've created the sprite, we're going to need some data files to tell the game that it exists and what stats to give it.
And then we're going to need a line entry in our ship_data.csv & wing_data.csv for the fighter we're making, and a .ship file. Since we don't even have a wing_data.csv file yet, let's copy vanilla's from 'Starsector/starsector-core/data/hulls/', and delete all the lines, just so we have all the columns right. Now, let's go back to vanilla's ship_data.csv and copy a line of stats over from a fighter that's fairly close to what we want ours to be. In this case, I'm picking the Broadsword.
As you can see, I've actually pasted it in twice and prepended a '#' to the second one's name -- I'm going to leave that one there as I edit the top one, so I can compare my stats to the original without opening vanilla's ship_data file again. I'm not going to tell you how to set up your stats, so use the vanilla file and the Ship Data CSV wiki page as references and get to editing. Just make sure you at least change the name and hull id (which should be prefixed with your mod prefix, and all lowercase). In the end, you should end up with something like this:
I've set up the Firefly as a speedy, tough-to-kill assault fighter like the broadsword-- nothing approaching the utility of the Spark or the speed and armament of the Thunder, but much more survivable. Now that we've done that, it's time to fire up the Ship and Weapon Editor and make our ship file!
Ship Data files[]
(Just as a reminder, these instructions are for the Starsector Ship and Weapon Editor from the Starsector forums. link: https://fractalsoftworks.com/forum/index.php?topic=11491.0)
On running the ship editor for the first time, you're going to see a little pop-up telling you to select the Starsector install directory. It's important that you select the Starsector folder here, not 'starsector-core' or anything else.
The first thing you're going to notice once you get into the editor is the whole pile of menu items. Don't panic, you can read Vayra's guide on ships above where they go through everything.
First, we have to load our mod folder: Press 'm', then navigate to `Starsector/mods/` and select your mod folder - in this case 'Starsector/mods/mymod/'.
Next we're going to do is press 'i' and load in our nice new fighter sprite, then press 't' to edit the details. If something goes wrong and your ship editor won't load any ships or weapons, simply delete the .json file in the ship editor directory -- this will reset the settings -- and run the program again, making sure to load the starsector folder and then mod folder separately and correctly.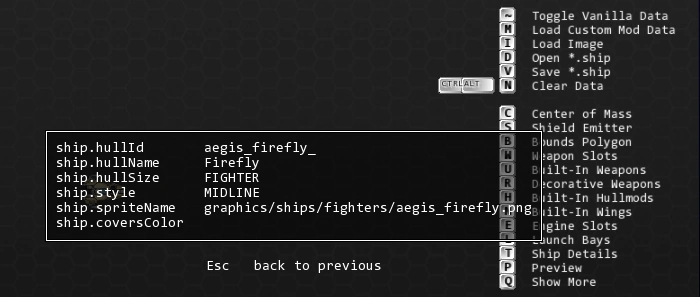
Then we're going to press 'esc' to close out of the ship details screen, and 'v' to save it. Make sure you're saving it in the 'mymod/data/hulls' directory -- the editor might default somewhere weird.
(You could also make a fighters folder in here, I forgot to)
Once we've saved it, let's continue: Press 'c' and set the center of mass (the point the fighter turns around) then 'ctrl' and drag out the collision circle -- this needs to fully encompass the fighter and it's shields, so don't be afraid to set it a little big. After that, press 's' (and then 'ctrl') to do the same thing with the shield center (and the shield circle). Do that even if the fighter you're making doesn't have shields -- some other effects may use it. The shield circle should completely encompass the fighter sprite (and ideally some room behind it, for engine flares) and fall entirely within the collision circle.
Once you're done that, it's time to move on the the bounds polygon. Press 'b' to open that menu, then place points with 'shift+leftclick'. You can turn 'mirroring' on and off with the spacebar. Note that the bounds polygon shouldn't be too detailed (link: https://fractalsoftworks.com/forum/index.php?topic=4270.0 )
Even though the Firefly has these parts that stick out it shouldn't matter at all since its a small fighter & can be neatly bounded with 4 polygons 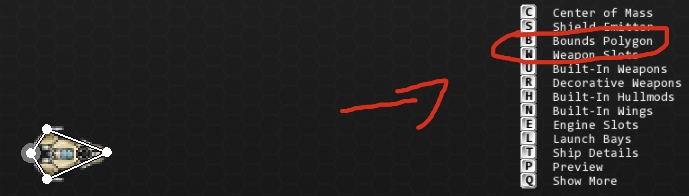
Once you're done that, save it again and it's time to do weapon slots. I'm going to trust you to read the hotkeys for that on your own. Important note: When placing a weapon slot on a fighter it should be set to "HIDDEN" so it doesn't get destroyed. For this reason it is extremely important to go over all of your weapon slots after placing them and press 't' while mousing over each one to check (and set, if necessary) the size, type, and turret/hardpoint settings: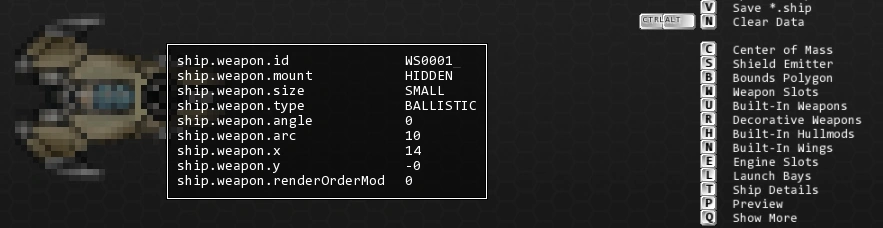
Since we don't have any hullmods or special weapons done yet, we're going to skip over those options and move right on to engines. Engines are also fairly straightforward, but some things you'll want to remember are:
- Just like weapon slots, engine slots default to the same settings as the nearest existing engine or LOW_TECH if there aren't any -- even if you already set the whole ship's tech level to something else. So just like weapon slots, make sure you mouse over them all and press 't' over each one to double-check their settings.
- 128 is a magic number: Setting 'contrailSize' to 128 in the engine settings will make that engine flare disappear, and only show up when the ship is using its shipsystem. This is useful for things like maneuvering jets -- Open up the vanilla Eagle .ship file in the ship editor and take a look at it for an example.
After creating engines, make sure to save by pressing 'v' before continuing: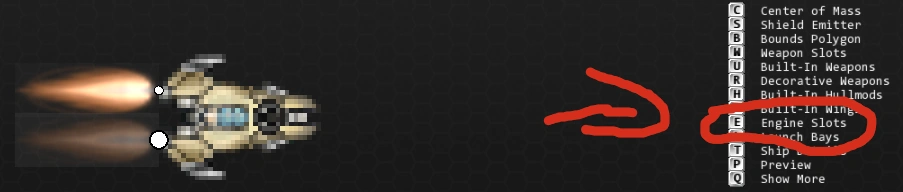
Descriptions[]
A description is important so people can figure out what your fighter actually does.
If you haven't already, make a strings folder in mymod/data and open the starsector-core/data/strings folder, copy 'descriptions.csv', and paste it into ours. Open that file up and delete all the lines below the headers, just like you did with ship_data.csv. Next, we're going to add a line with the following information: 'id' needs to match the id of our ship in the .ship file and ship_data.csv, 'type' should (in this instance) be 'SHIP', and 'text1' will contain the actual description of our ship.
Note that while you can add new lines within the 'text1' cell using 'alt+enter', only the first line will be displayed in-game outside of the codex, so try to keep most of the immediately useful information there. The rest of the fields can remain empty for ships (though they are used for weapons and some other things).
Once you've done that, save the file.
Time to move on to making a variant, and then making it spawn.
Loadout Variants[]
First things first: Reopen the ship editor, press 'd' to load your ship, and then press '2' to go to variant mode. Press 't' to open the details pane, give your variant a descriptive name (the hull id should already be set, assuming you loaded your ship first), then press 'esc' to close the details pane and 'v' to save the variant. Make sure you're saving it in the 'mymod/data/variants/fighters' directory, which you'll have to create if it doesn't exist yet.
Note: If your ship won't load, press 'm' to load custom mod data and select your 'mymod' folder in the 'Starsector/mods/' directory, then press 'OK'.
Note: the standard convention for variant ids is 'modprefix_hullid_Variantname' -- you don't have to use this, but it will certainly make things more consistent. Note the capital letter at the start of the variant name in the id.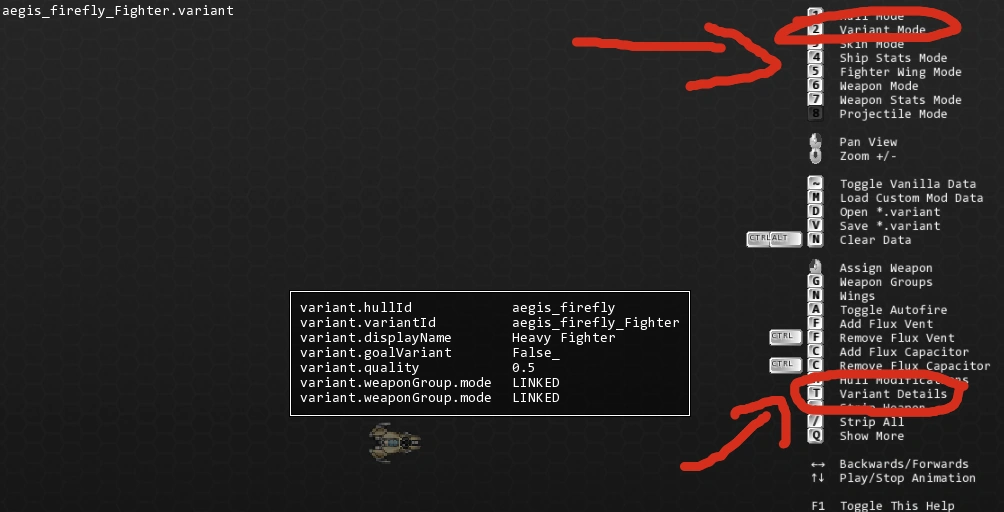
Once you've saved your variant, build it out with weapons using the hotkeys (Vents, capacitors & ordnance points are unneeded for a fighter). Your ships current flux infrastructure are displayed in the top left corner.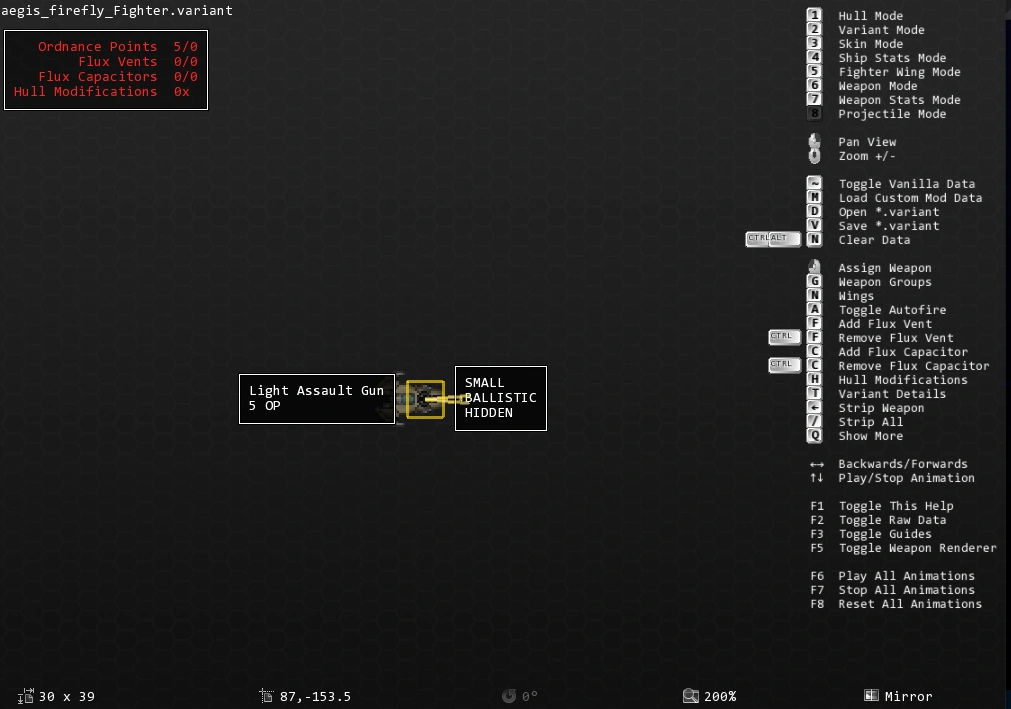
Press 'g' to setup your weapon groups before saving, then 'v' to save the variant.
While your here you should edit its wing_data.csv
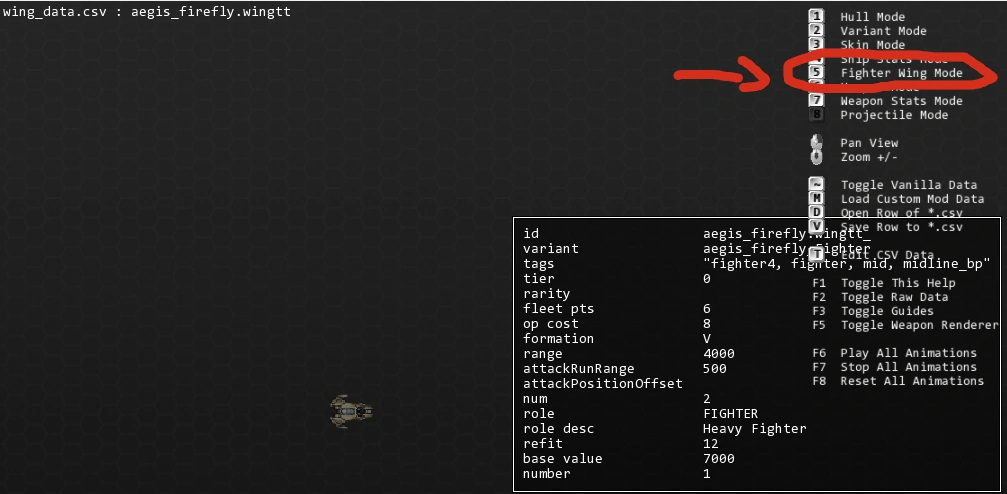
The "tt" at the end of .wing was an accident & should be ignored.
Save the file and that should be enough for it to spawn in-game.
Campaign Spawning (also required for Custom Production from Colonies)[]
Making our fighter spawn in the campaign is going to be fairly easy unlike a ship, but we will need to edit a few things.
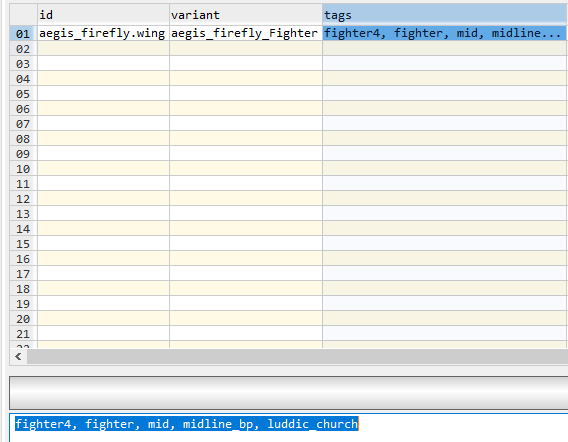
Now we've got everything else set up, but the Firefly isn't quite fully implemented yet -- no faction knows how to build it, after all. In order to get that working, we're going to have to reopen our wing_data.csv file. Scroll over to the right to find the 'tags' column, and input some tags -- these determine who will 'know' the ship blueprint. Notes:
- most tags ending in '_bp' are blueprint package tags -- adding a ship to these will make it 'known' by anyone who 'knows' that tag, and will add it to the blueprint package matching that tag, allowing the player to learn it by finding the matching package blueprint -- i.e 'lowtech_bp' can be used to add a ship to the Low Tech Blueprint Package.
- the 'base_bp' tag is a special blueprint package tag -- adding a ship to this will make it known by all factions that know the 'base_bp' tag (that's all vanilla factions, and many mod factions too) as well as the player, from the very start of the game.
- the 'rare_bp' tag works slightly differently -- adding a ship to this will allow the player to learn it by finding a blueprint for that specific ship and that ship alone. Using this tag, blueprints are generated automatically by the game. Generally speaking a ship should only be part of one blueprint tag -- either 'rare_bp' or a package blueprint.
- tags corresponding to factions are faction tags -- adding a ship to these will make it 'known' by that faction specifically, without adding it to a package blueprint. Note that some factions have both a faction and a blueprint package tag -- i.e. 'pirate_bp' is a blueprint package tag, and 'pirates' is the faction tag for the pirate faction.
- 'fighter4' means its a high tier fighter, with 5(?) being the highest in the base game, 'fighter' means it isn't a interceptor/bomber. I don't know what mid does but the vanilla midline_bp fighters have it so we will add it as well.
In this case, I want the Firefly to be fairly common among midline-capable factions so I'm adding it to the midline blueprint package tag, and besides that it seems like something that the Luddic Church would have access to despite not knowing the midline blueprint, so let's add it to their faction tag as well. Here's what this looks like all set up:
Save that file, and let's go test! Load up Starsector and start a new campaign, then open the console with 'ctrl+backspace' (again, unless you've changed the keybinding) and type 'finditem' followed by your ship's hull id. Assuming you set the tags correctly, it should show up in a faction market or two but if it's not, try entering the console command 'forceMarketUpdate' before you start troubleshooting.
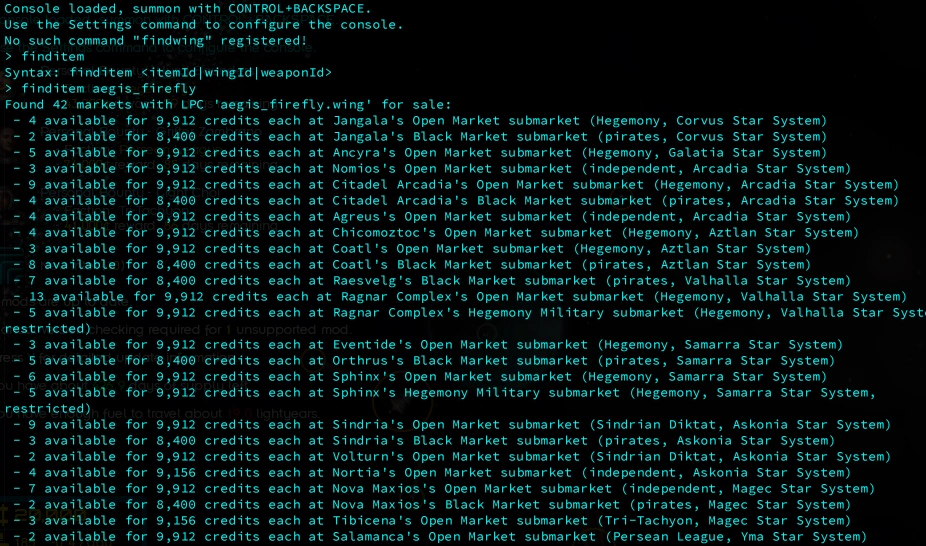
If you see something like the above, then you're good to go! Congratulations -- you've made and implemented a new fighter! We're all done!
...
Now balance the fuck out of it.
Custom Ship Skin[]
Custom Faction[]
Custom Market[]
Custom Star System[]
There are two ways to make a custom star system. One is configuration only through CSVs and will be covered in this block
TODO: Creating a star system using csv.
The other way is through java code. For those with any programming experience this will likely be a more familiar route with greater flexibility.
First, choose and set up an IDE to add the game's libraries to help with code completion by following this guide, or follow an older, but still functional, IntelliJ guide here: https://fractalsoftworks.com/forum/index.php?topic=10057.0 or follow an older, but very functional, NetBeans guide here: https://fractalsoftworks.com/forum/index.php?topic=3173.0
First in vayra/example (replace with your own name and mod)(may also be in src/vayra/example, depending on which IDE guide you are following) go ahead and make your MyModPlugin.java file which will look something like this
package vayra.example;

import com.fs.starfarer.api.BaseModPlugin;
import com.fs.starfarer.api.Global;

public class MyModPlugin extends BaseModPlugin {
    private static void initMyMod() {
        new MyModGen().generate(Global.getSector());
    }

    @Override
    public void onNewGame() {
        Global.getLogger(this.getClass()).info("Hooray My mod plugin in a jar is loaded!");
        initMyMod();
    }
}
Your goal here is to make it so that on a new game, StarSector will call this method and you'll call a method we are about to make to initialize your mod (by spawning a custom star system!)
Remember back when you created the mod_info.json file and deleted some lines? Well, it's time to add one back to your mod_info.json so that the game knows how to start your mod.
"modPlugin":"vayra.example.MyModPlugin",
This needs to match the "package vayra.example;" at the top of MyModPlugin. See how it also matches the folders in Windows? vayra/example/MyModPlugin.java.
Now make a subdirectory called "world" (vayra/example/world or src/vayra/example/world, whatever you're doing)
Inside you will place your MyModGen.java file which will look something like this
package vayra.example.world;

import com.fs.starfarer.api.campaign.SectorAPI;
import vayra.example.world.systems.MySystem;

public class MyModGen {
    public void generate(SectorAPI sector) {
        new MySystem().generate(sector);
    }
}
Now add a "systems" folder inside the "world" folder so you can add MySystem. To add more systems, just keep adding system files and importing and calling them like we did with MySystem
package vayra.example.world;

import com.fs.starfarer.api.campaign.SectorAPI;
import vayra.example.world.systems.MySystem;

public class MyModGen {
    public void generate(SectorAPI sector) {
        new MySystem().generate(sector);
        new MyOtherSystem().generate(sector);
    }
}
So now we need to make MySystem.java and get into the details! First here's a template/boilerplate to start with
package vayra.example.world.systems;

import java.awt.Color;
import java.util.ArrayList;
import java.util.Arrays;
import java.util.concurrent.locks.Condition;

import com.fs.starfarer.api.Global;
import com.fs.starfarer.api.campaign.*;
import com.fs.starfarer.api.campaign.econ.EconomyAPI;
import com.fs.starfarer.api.campaign.econ.MarketAPI;
import com.fs.starfarer.api.characters.PersonAPI;
import com.fs.starfarer.api.impl.campaign.ids.*;
import com.fs.starfarer.api.impl.campaign.procgen.NebulaEditor;
import com.fs.starfarer.api.impl.campaign.procgen.PlanetConditionGenerator;
import com.fs.starfarer.api.impl.campaign.procgen.StarAge;
import com.fs.starfarer.api.impl.campaign.procgen.StarSystemGenerator;
import com.fs.starfarer.api.impl.campaign.terrain.AsteroidFieldTerrainPlugin.AsteroidFieldParams;
import com.fs.starfarer.api.impl.campaign.terrain.HyperspaceTerrainPlugin;
import com.fs.starfarer.api.util.Misc;
import com.fs.starfarer.api.impl.campaign.terrain.MagneticFieldTerrainPlugin.MagneticFieldParams;
import org.lazywizard.lazylib.MathUtils;

public class MySystem {
    public void generate(SectorAPI sector) {

        StarSystemAPI system = sector.createStarSystem("My Star");
        system.getLocation().set(-39000,39000); //top leftish

        system.setBackgroundTextureFilename("graphics/mymod/backgrounds/mybackground.jpg");
Your IDE will help you figure out what imports you aren't using or what others to add as you go.
Two notes - first you'll probably not have your own background if you didn't make one, so use one from the game in graphics/backgrounds/background5.jpg for example - go check them out.
Second, you need to figure out where to place your star system(s) right? Well the modders have a handy map to keep people from slapping over-top of one another too much: https://fractalsoftworks.com/forum/index.php?topic=11422.0
I strongly recommend you make a copy of the document to play with until you figure out where you want stuff and then just add it to the official one. Note the "labels" are how they setup the labels on the left - its actually just "placed" there and not some magic list so look closely at the location to get yours to line up neatly. I also couldn't figure out how to set colors so I'm sorry.
Now that that's out of the way - what do you wanna place in this system? Here's some examples:
Star[]
Everyone loves the energy emitting balls of gas that populate our galaxy! Most systems will have a star which most objects are orbiting, but you can always put other things here like a black hole or pulsar.
// create the star and generate the hyperspace anchor for this system
PlanetAPI argonStar = system.initStar("Argon", // unique id for this star
        "star_red_giant", // id in planets.json
        1100f, // radius (in pixels at default zoom)
        450); // corona radius, from star edge
system.setLightColor(new Color(239, 155, 128)); // light color in entire system, affects all entities
It is often useful to setLightColor based on your star color but you can do whatever, those are 8bit RGB values.
Note that you can find the strings identifying star types in the starsector-core/data/config/planets.json. Also you could make your own based on these and load them from your own mod, but that is outside the scope of this tutorial.
For the most part, you will spawn everything else in relative orbit around this star (binary stars could just orbit one another, or one around the other, whatever you want to do)
Terrain[]
Asteroids, stable points, inactive gates, etc
Here's an example of some
SectorEntityToken argonAF1 = system.addTerrain(Terrain.ASTEROID_FIELD,
        new AsteroidFieldTerrainPlugin.AsteroidFieldParams(
                200f, // min radius
                300f, // max radius
                8, // min asteroid count
                16, // max asteroid count
                4f, // min asteroid radius
                16f, // max asteroid radius
                "Asteroids Field")); // null for default name
argonAF1.setCircularOrbit(argonStar, 130, asteroids1Dist, 240);

//add first stable loc
SectorEntityToken stableLoc1 = system.addCustomEntity("argon_stableloc_1", "Stable Location", "stable_location", Factions.NEUTRAL);
stableLoc1.setCircularOrbit(argonStar, MathUtils.getRandomNumberInRange(0f, 360f), stable1Dist, 520);
Note how each at some point takes in the star variable as that is their orbital body - you could make them orbit a planet, another terrain entity, or whatever you want.
Do you see those getRandomNumberInRange stuff? That's setting a random 360 degree orientation so the system starts each new game in a different relative position around the sun. There might be some objects you want near one another which thus need to orbit, or have close to the same starting position and orbital period.
Here is an example of an asteroid belt or ring
//asteroid belt1 ring
system.addAsteroidBelt(argonStar, 1000, asteroidBelt1Dist, 800, 250, 400, Terrain.ASTEROID_BELT, "Inner Band");
system.addRingBand(argonStar, "misc", "rings_asteroids0", 256f, 3, Color.gray, 256f, asteroidBelt1Dist - 200, 250f);
system.addRingBand(argonStar, "misc", "rings_asteroids0", 256f, 0, Color.gray, 256f, asteroidBelt1Dist, 350f);
system.addRingBand(argonStar, "misc", "rings_asteroids0", 256f, 2, Color.gray, 256f, asteroidBelt1Dist + 200, 400f);
Note the one that spawns the actual belt is what is on the map and has asteroid objects - the other two are visual objects which help give appearance without needing to make the game handle tends of thousands of asteroids to be "realistic". This example has 3 nice bands.
Planets (Custom un-inhabited)[]
// Hye-Steel: Useful world way far out, ruins, decivilized
PlanetAPI hye_steel = system.addPlanet("hye_steel",
        argonStar,
        "Hye-Steel",
        "frozen",
        360 * (float) Math.random(),
        190f,
        hye_steelDist,
        3421f);
hye_steel.setCustomDescriptionId("redlegion_argon_hye_steel"); //reference descriptions.csv
hye_steel.getMarket().addCondition(Conditions.RUINS_WIDESPREAD);
hye_steel.getMarket().addCondition(Conditions.VERY_COLD);
hye_steel.getMarket().addCondition(Conditions.DECIVILIZED);
hye_steel.getMarket().addCondition(Conditions.DARK);
hye_steel.getMarket().addCondition(Conditions.ORE_ULTRARICH);
hye_steel.getMarket().addCondition(Conditions.RARE_ORE_MODERATE);
Note the "frozen" string identifier. This comes from the same starsector-core\data\config\planets.json
Here we are setting conditions manually - it may be important to note this can be tedious and may not behave as expected if you forget something important. In this case I knew exactly what I wanted for the planet. In the case below, we just flesh out whatever the game thinks is appropriate based on the planet type and star age.
Planets (Generate for me)[]
// Argon Gamma: Dead World
PlanetAPI argonGamma = system.addPlanet("argon_gamma",
        argonStar,
        "Argon Gamma",
        "barren-bombarded",
        360f * (float) Math.random(),
        320f,
        argonGammaDist,
        1421f);
argonGamma.setCustomDescriptionId("redlegion_argon_argonGamma"); //reference descriptions.csv
PlanetConditionGenerator.generateConditionsForPlanet(argonGamma, StarAge.AVERAGE);
Note the "barren-bombarded" string identifier. This comes from the same starsector-core\data\config\planets.json
We are using PlanetConditionGenerator to make up conditions. This means the world will be randomly generated based on the passed in star age (in this example, AVERAGE). This adds some good randomness to world's you didn't have a particular need/idea in mind for.
Planets (Inhabited)[]
First you'll be making a lot of markets. Here is a helper function. If you have multiple systems, put it in a file of utilities so you can import them and use them in different places
/**
 * Shorthand function for adding a market -- this is derived from tahlan mod
 */
public static MarketAPI addMarketplace(String factionID, SectorEntityToken primaryEntity, List<SectorEntityToken> connectedEntities, String name,
                                       int popSize, List<String> marketConditions, List<String> submarkets, List<String> industries, float tariff,
                                       boolean isFreePort, boolean floatyJunk) {
    EconomyAPI globalEconomy = Global.getSector().getEconomy();
    String planetID = primaryEntity.getId();
    String marketID = planetID + "_market"; //IMPORTANT this is a naming convention for markets. didn't want to have to pass in another variable :D

     MarketAPI newMarket = Global.getFactory().createMarket(marketID, name, popSize);
     newMarket.setFactionId(factionID);
     newMarket.setPrimaryEntity(primaryEntity);
     //newMarket.getTariff().modifyFlat("generator", tariff);
     newMarket.getTariff().setBaseValue(tariff);

    //Add submarkets, if any
    if (null != submarkets) {
        for (String market : submarkets) {
            newMarket.addSubmarket(market);
        }
    }

    //Add conditions
    for (String condition : marketConditions) {
        newMarket.addCondition(condition);
    }

    //Add industries
    for (String industry : industries) {
        newMarket.addIndustry(industry);
    }

    //Set free port
    newMarket.setFreePort(isFreePort);

     //Add connected entities, if any
     if (null != connectedEntities) {
         for (SectorEntityToken entity : connectedEntities) {
             newMarket.getConnectedEntities().add(entity);
         }
     }

    //set market in global, factions, and assign market, also submarkets
    globalEconomy.addMarket(newMarket, floatyJunk);
    primaryEntity.setMarket(newMarket);
    primaryEntity.setFaction(factionID);

     if (null != connectedEntities) {
         for (SectorEntityToken entity : connectedEntities) {
             entity.setMarket(newMarket);
             entity.setFaction(factionID);
         }
     }

    //Finally, return the newly-generated market
    return newMarket;
}
This has worked well so far. Mostly I have to rememeber not to add a FREEPORT condition since you pass that in separately since it is such a big deal. Also note the enforced naming convention for market variables - you could just pass it in. Here is an example of using it:
// Argon Prime: Terran homeworld
PlanetAPI argonPrime = system.addPlanet("argon_prime",
        argonStar,
        "Argon Prime",
        "terran",
        360f * (float) Math.random(),
        220f,
        argonPrimeDist,
        320f);

argonPrime.setCustomDescriptionId("redlegion_argon_argonprime"); //reference descriptions.csv

MarketAPI argonPrime_market = addMarketplace("redlegion", argonPrime, null,
        "Argon Prime",
        6,
        Arrays.asList(
                Conditions.POPULATION_6,
                Conditions.ORE_RICH,
                Conditions.RARE_ORE_ABUNDANT,
                Conditions.FARMLAND_BOUNTIFUL,
                Conditions.HABITABLE,
                Conditions.ORGANIZED_CRIME,
                Conditions.TERRAN,
                Conditions.REGIONAL_CAPITAL,
                Conditions.STEALTH_MINEFIELDS,
                Conditions.AI_CORE_ADMIN
        ),
        Arrays.asList(
                Submarkets.GENERIC_MILITARY,
                Submarkets.SUBMARKET_OPEN,
                Submarkets.SUBMARKET_STORAGE,
                Submarkets.SUBMARKET_BLACK
        ),
        Arrays.asList(
                Industries.POPULATION,
                Industries.MEGAPORT,
                Industries.MINING,
                Industries.STARFORTRESS,
                Industries.HEAVYBATTERIES,
                Industries.HIGHCOMMAND,
                Industries.WAYSTATION
        ),
        0.18f,
        true,
        true);

argonPrime_market.addIndustry(Industries.ORBITALWORKS, Collections.singletonList(Items.PRISTINE_NANOFORGE)); //couldn't find another way to add w/ forge!
argonPrime_market.getIndustry(Industries.HIGHCOMMAND).setAICoreId(Commodities.ALPHA_CORE);
argonPrime_market.getIndustry(Industries.STARFORTRESS).setAICoreId(Commodities.ALPHA_CORE);
argonPrime_market.getIndustry(Industries.MEGAPORT).setAICoreId(Commodities.ALPHA_CORE);
argonPrime_market.getIndustry(Industries.ORBITALWORKS).setAICoreId(Commodities.ALPHA_CORE);
argonPrime_market.getIndustry(Industries.POPULATION).setAICoreId(Commodities.BETA_CORE);
argonPrime_market.getIndustry(Industries.WAYSTATION).setAICoreId(Commodities.GAMMA_CORE);
You'll note all that crazy stuff at the bottom? That's me manually assigning AI cores.
The first line at the bottom is about adding the ORBITALWORKS - this was the only working example I could find of how to add a NANOFORGE to one as it isn't a Commodities item and there didn't seem to be a special function for it. I presume you would do the same with the fuel production item also. Note this actually adds it to the market in this method, so we don't include it in the normal market constructor method.
Space Stations (Inhabited)[]
Again using the helper function from Planets (Inhabited)
// Blood Keep - the Blood Knight Citadel: Far orbital near the fringe point for garrison, place where strike forces report back and regroup
SectorEntityToken bloodKeep = system.addCustomEntity("argon_blood_keep", "Blood Keep", "station_hightech2", "redlegion");
bloodKeep.setCircularOrbitPointingDown(argonStar, 0, bloodDist, 4000f);
bloodKeep.setCustomDescriptionId("redlegion_argon_bloodkeep");
MarketAPI bloodKeep_market = addMarketplace("redlegion", bloodKeep, null,
        "Blood Keep",
        4,
        Arrays.asList(
                Conditions.POPULATION_4,
                Conditions.NO_ATMOSPHERE,
                Conditions.OUTPOST,
                Conditions.AI_CORE_ADMIN
        ),
        Arrays.asList(
                Submarkets.GENERIC_MILITARY,
                Submarkets.SUBMARKET_STORAGE,
                Submarkets.SUBMARKET_BLACK
        ),
        Arrays.asList(
                Industries.POPULATION,
                Industries.SPACEPORT,
                Industries.BATTLESTATION_HIGH,
                Industries.HEAVYBATTERIES,
                Industries.MILITARYBASE,
                Industries.ORBITALWORKS,
                Industries.WAYSTATION
        ),
        0.18f,
        false,
        false);

bloodKeep_market.getIndustry(Industries.MILITARYBASE).setAICoreId(Commodities.BETA_CORE);
bloodKeep_market.getIndustry(Industries.BATTLESTATION_HIGH).setAICoreId(Commodities.ALPHA_CORE);
bloodKeep_market.getIndustry(Industries.ORBITALWORKS).setAICoreId(Commodities.BETA_CORE);
You'll note the string "station_hightech2" which corresponds with the name of the entity image in the starsector-core/graphics/stations folder. Otherwise it behaves much like any other item, except we had to use the setCircularOrbitPointingDown method to put it into orbit around the star (or another planet, whatever).
Jump Points[]
You can manually setup jump points:
JumpPointAPI jumpPoint3 = Global.getFactory().createJumpPoint(
        "fringe_jump",
        "Fringe System Jump");

jumpPoint3.setCircularOrbit(system.getEntityById("Argon"), 2, jumpFringeDist, 4000f);
jumpPoint3.setStandardWormholeToHyperspaceVisual();

system.addEntity(jumpPoint3);
But there is also a helper logic you can use at the end of your generate method
system.autogenerateHyperspaceJumpPoints(true, false);

HyperspaceTerrainPlugin plugin = (HyperspaceTerrainPlugin) Misc.getHyperspaceTerrain().getPlugin();
NebulaEditor editor = new NebulaEditor(plugin);
float minRadius = plugin.getTileSize() * 2f;

float radius = system.getMaxRadiusInHyperspace();
editor.clearArc(system.getLocation().x, system.getLocation().y, 0, radius + minRadius, 0, 360f);
editor.clearArc(system.getLocation().x, system.getLocation().y, 0, radius + minRadius, 0, 360f, 0.25f);
First is the autogenerateHyperspaceJumpPoints which with options, will make them for gas giants/ice giants, and optionally sets up your other jump points for you.
HyperspaceTerrainPlugin is used here to setup your size/appearance outside of the system in hyperspace.
Dealing with distance:[]
You'll note in my examples I often use a variable for my orbitRadius. This is so I can easily keep everything together and nudge values around - it is very easy to have planets running through one another or make your system so big it takes a month to cross and no one will want to play there. Here's an example of my distances as listed near the top of my system's generate method
//setup all distances here
final float asteroids1Dist = 2750f;
final float argonDeltaDist = 1850f;
final float argonPrimeDist = 3500f;
final float stable1Dist = 4200f;
final float argonPhiDist = 4800f;
final float asteroidBelt1Dist = 5700f;
final float argonBetaDist = 6500f;
final float stable2Dist = 7100f;
final float strolluckDist = 8450f;
final float asteroids2Dist = 8900f;
final float argonMajorisDist = 11400f;
final float argonGammaDist = 14100f;
final float stable3Dist = 15200f;
final float asteroidBelt2Dist = 15700f;
final float bloodDist = 17200f;
final float hye_steelDist = 24700f;

final float jumpInnerDist = 3050f;
final float jumpOuterDist = 8400f;
final float jumpFringeDist = 16700f;

final float majorisRad = 670f;
And I think that is still too spread out, even with a funny ultra-rich world out in space far away
Also note I use camel case, but much of the games code uses all lowercase with underscore_dividers_between so you should pick and stick with an appropriate style.
Please leave any feedback about the tutorial so we can make it better :+1:
Quick, Miscellaneous Tips[]
Some compact informational material to help answer miscellaneous questions, or perhaps give you inspiration for an interesting mechanic you would like to experiment with.
AxleMC131's Infographics: https://imgur.com/a/PgAQDP7
- Charge times and their effects on both BEAM and NON-BEAM weapons.
Currently WIP, however please check out this other tutorial and this checklist.